

Export
Introduction
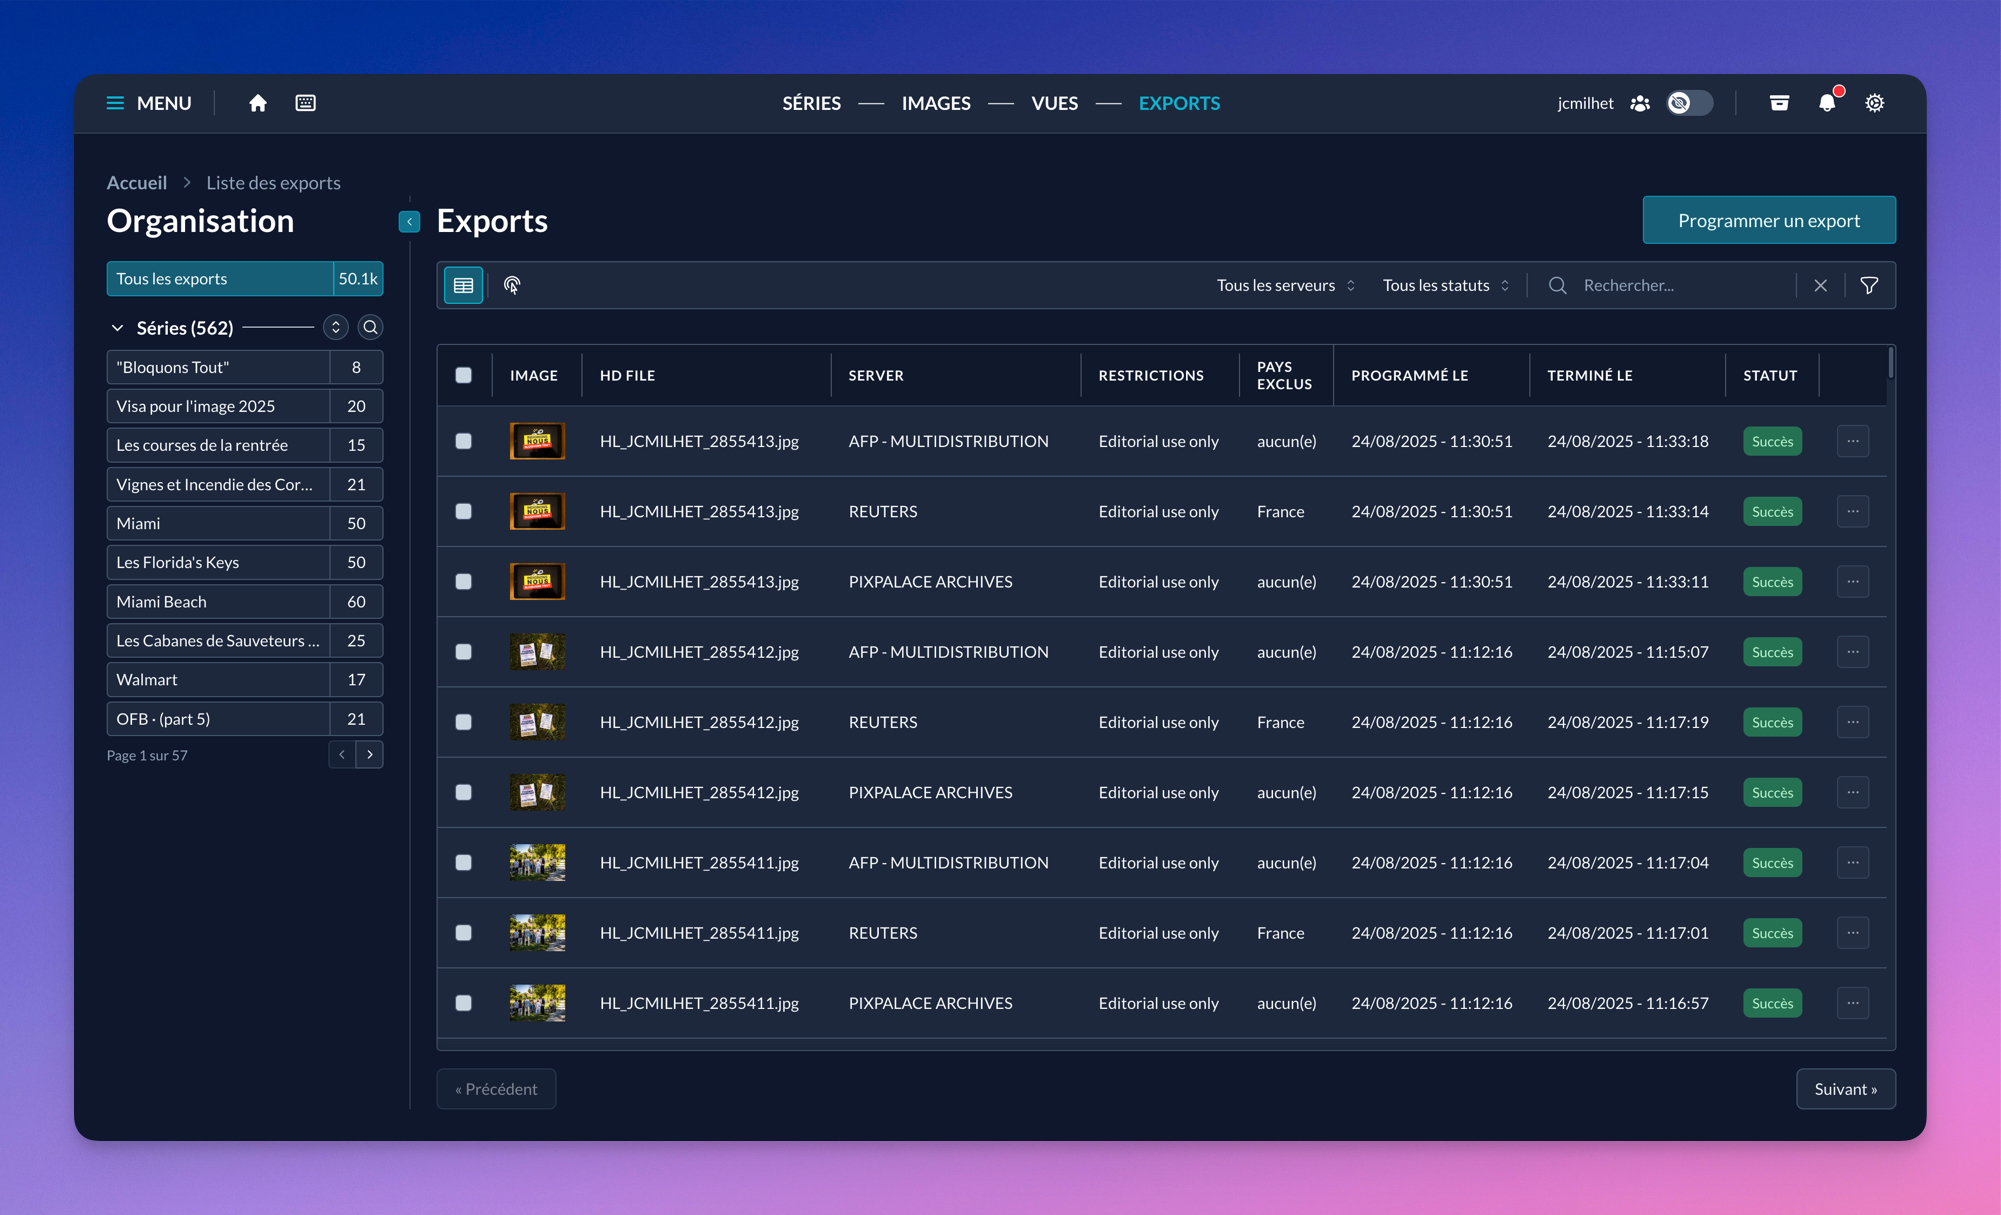
Exports are the records of sending your media to an external server. Each export keeps the status of that send: it can be successful, in progress, or failed.
Understanding exports
An export is always linked to a media and to a server.
For example, if you export a series of 20 images to 2 different servers, the system will create 20 exports per server, meaning 40 exports in total for that action.
Exports allow you to track precisely where and how your images have been distributed.
Create an export
Schedule an export
You can schedule an export from different MDALL interfaces.
Currently, export is possible via:
- Exports page
From the exports page, you can click the “New export” button. - Series assistant
From a series edit page, choose the “export” action in the contextual “Assistant” block. - View assistant
From a view edit page, choose the “export” action in the contextual “Assistant” block. - Image assistant
From an image edit page, choose the “export” action in the contextual “Assistant” block. - Cart
From the cart icon in the application menu, if the cart is not empty, you’ll have access to bulk actions including “export cart”. The action is also available from the cart’s bulk actions in the image list.
Step 1: Choose the source
When starting an export, the first step is to choose the source of the media to send.
Four options are available:
- Export the cart: sends all media currently in your cart.
- Last import: sends all media from your latest import.
- Export a series: allows you to directly export the media of a series.
- Export a view: sends the media visible from a filtered view.
Step 2: Image verification
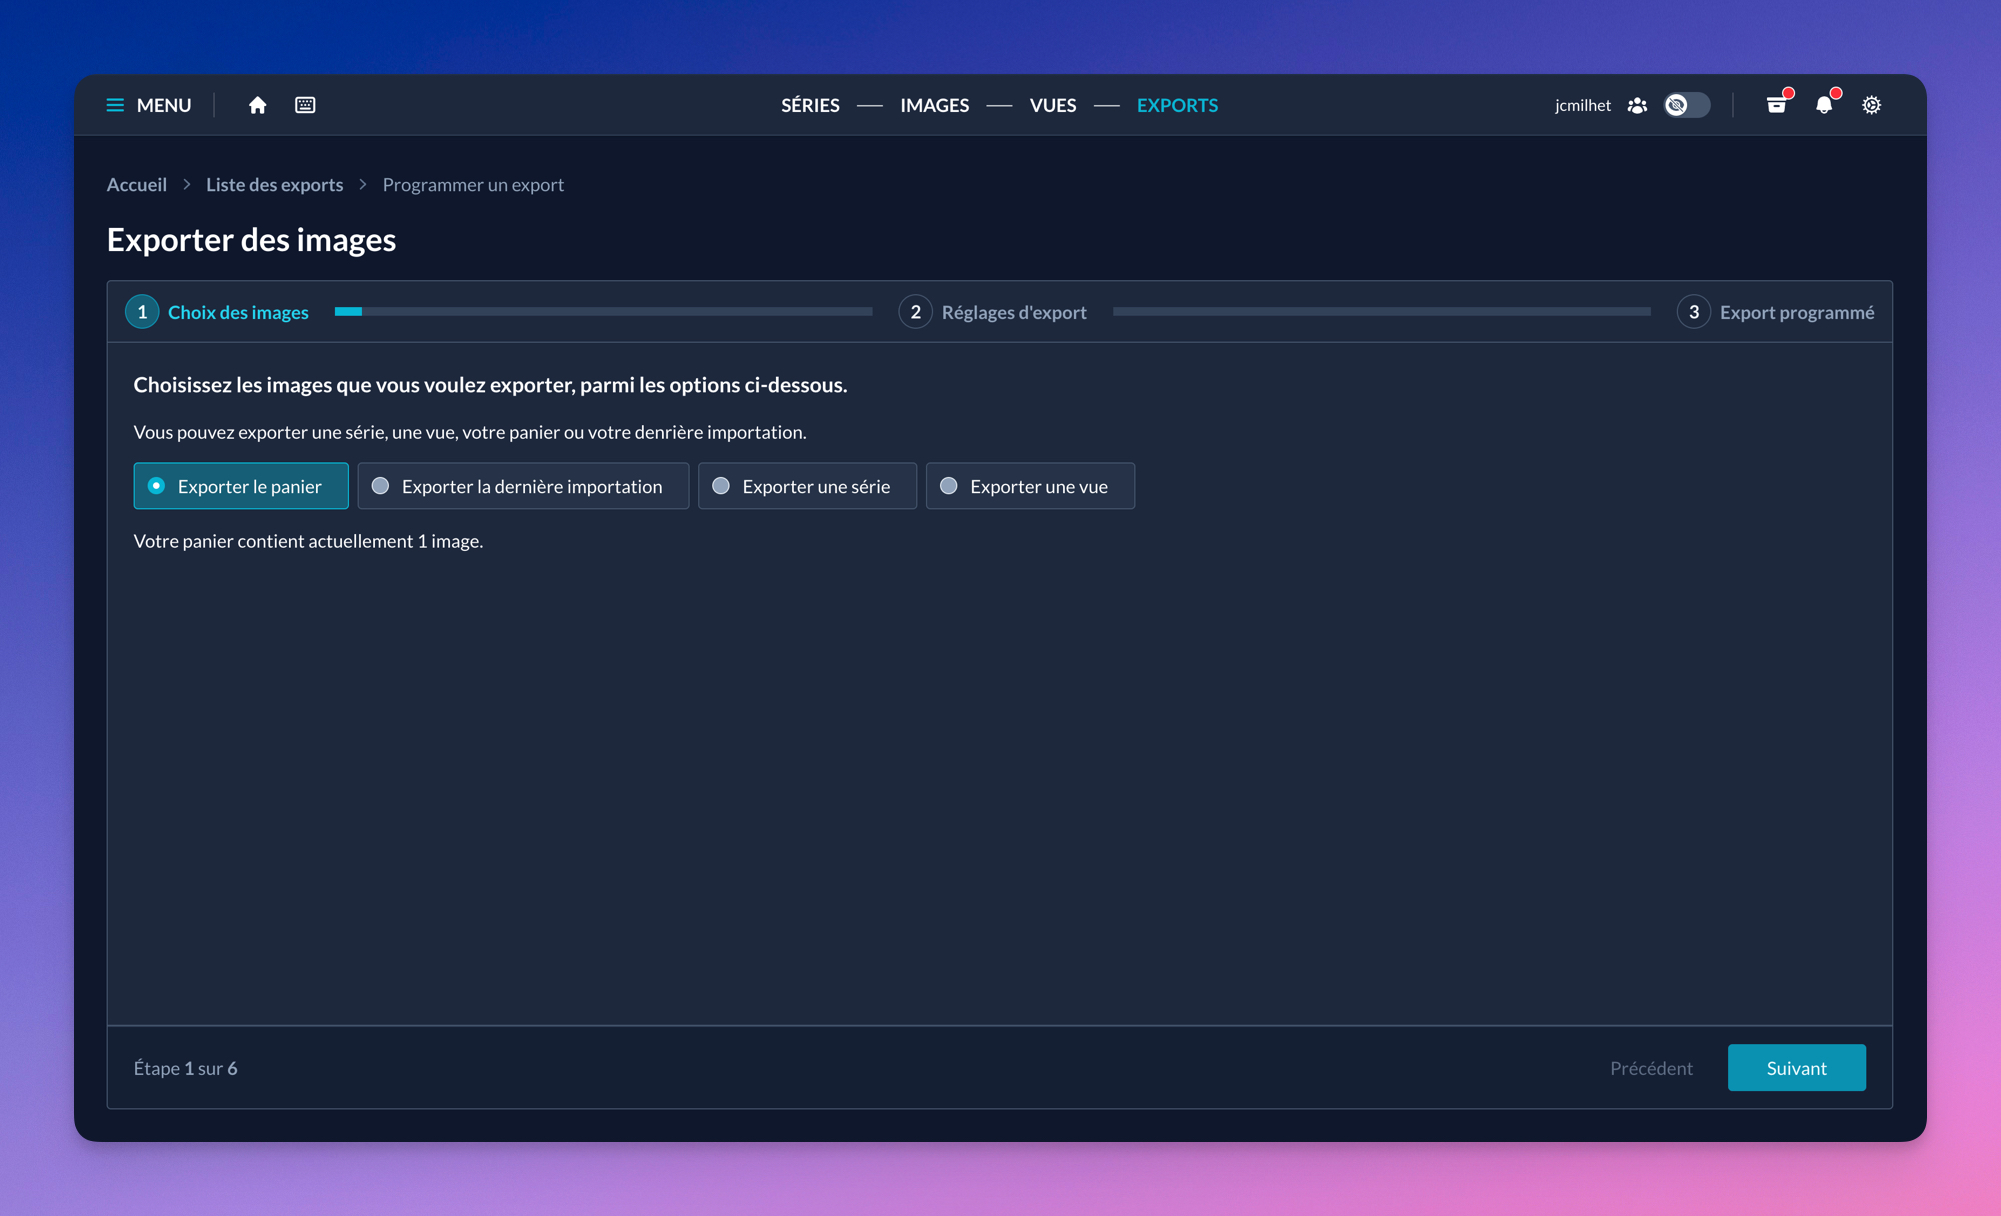
Once the source is selected, MDALL checks the images to ensure each file contains the mandatory metadata required for export.
- If an image is invalid, its border appears in red. You can click it to edit the HD file’s metadata and correct missing or incorrect fields.
- If an image is valid, its border appears in green.
You can also remove one or more images from the selection if you don’t want to export them.
Step 3: Export type
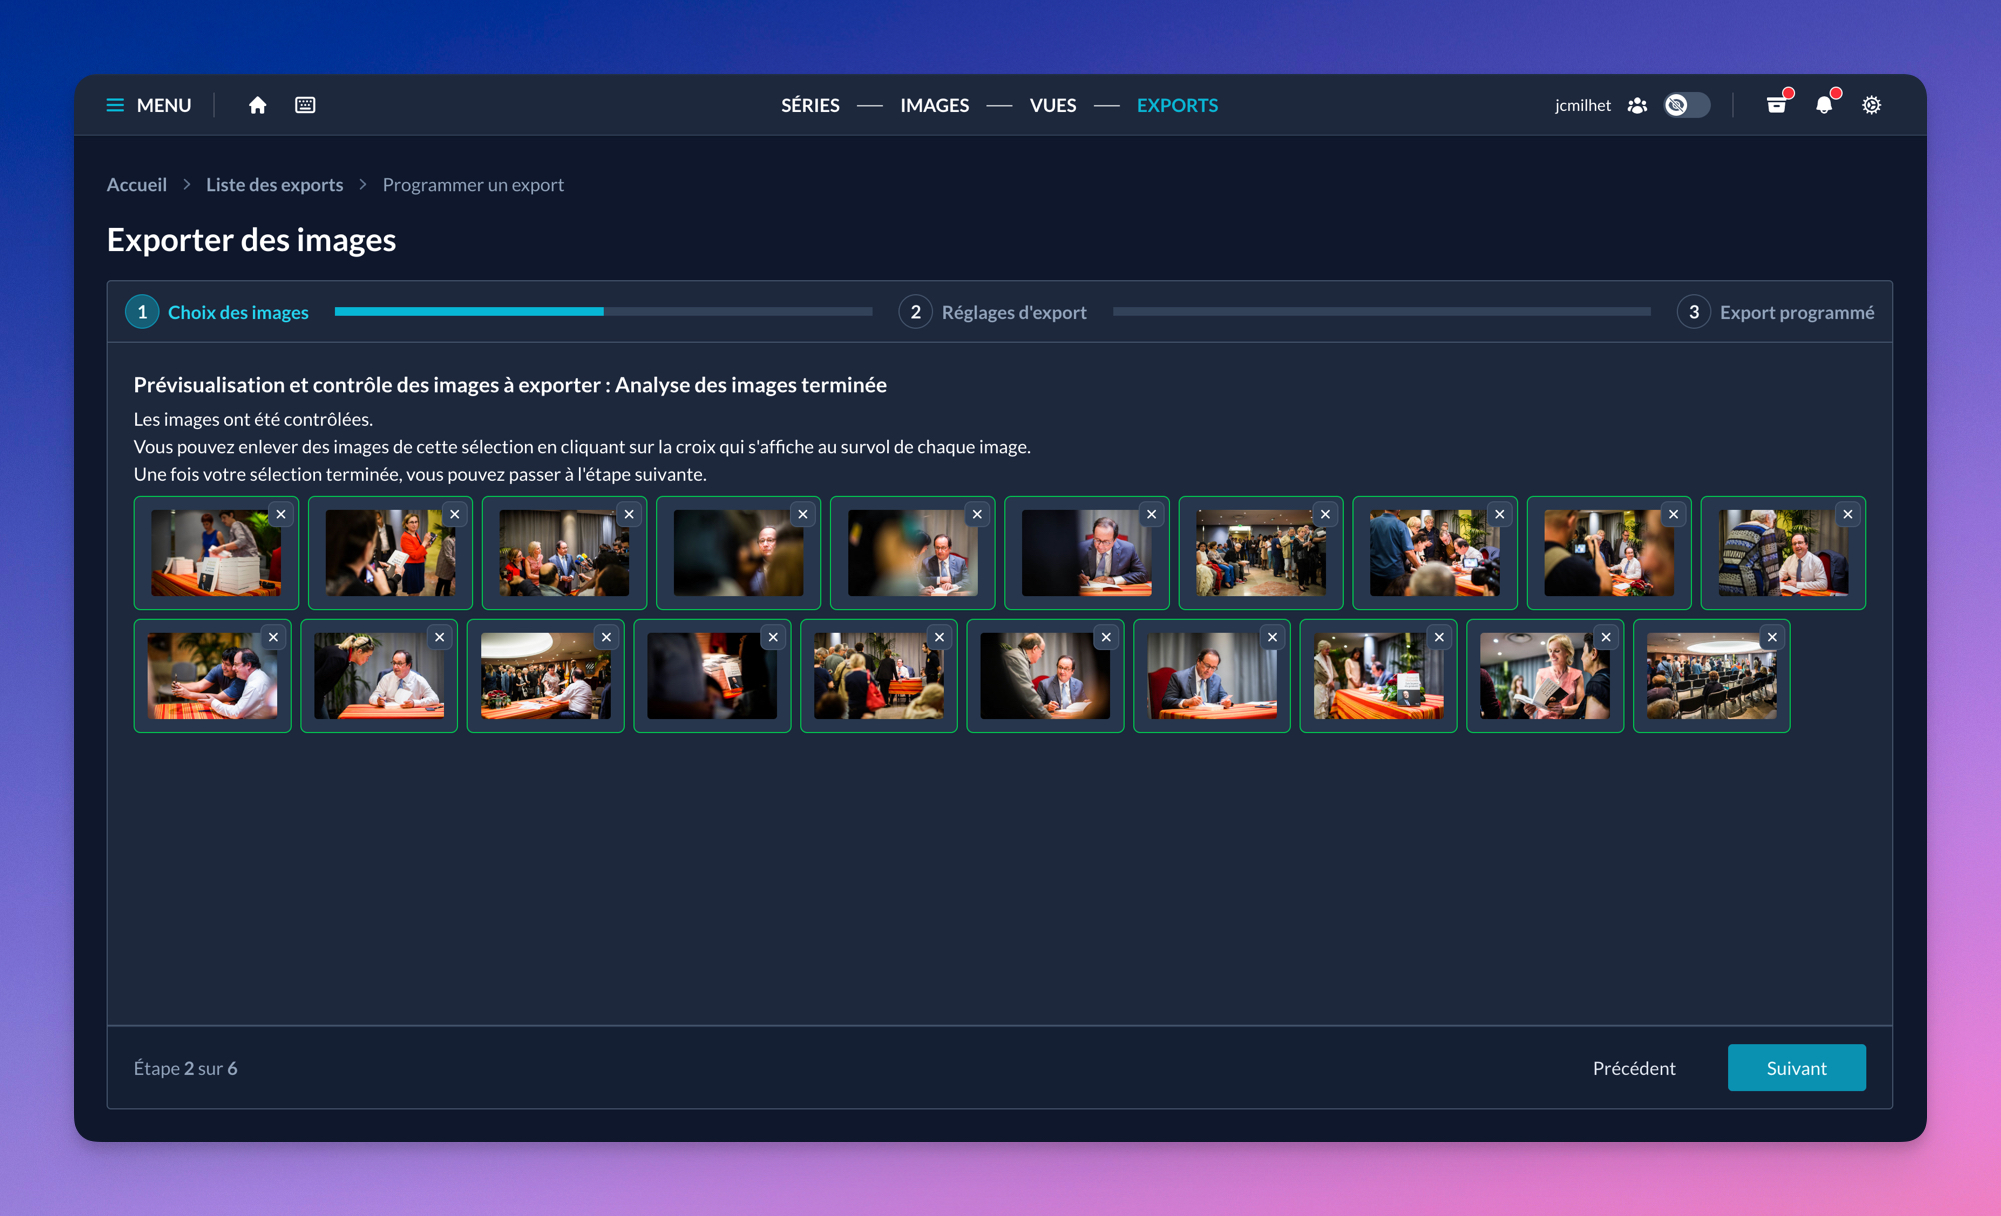
You must then define whether the export is News or Archive.
The difference only concerns the processing priority in MDALL’s export queue.
- A News-type image will be processed faster than an Archive-type image.
- The time difference is generally a few tens of minutes at most, except in exceptional cases.
Please reserve the News option for relevant situations.
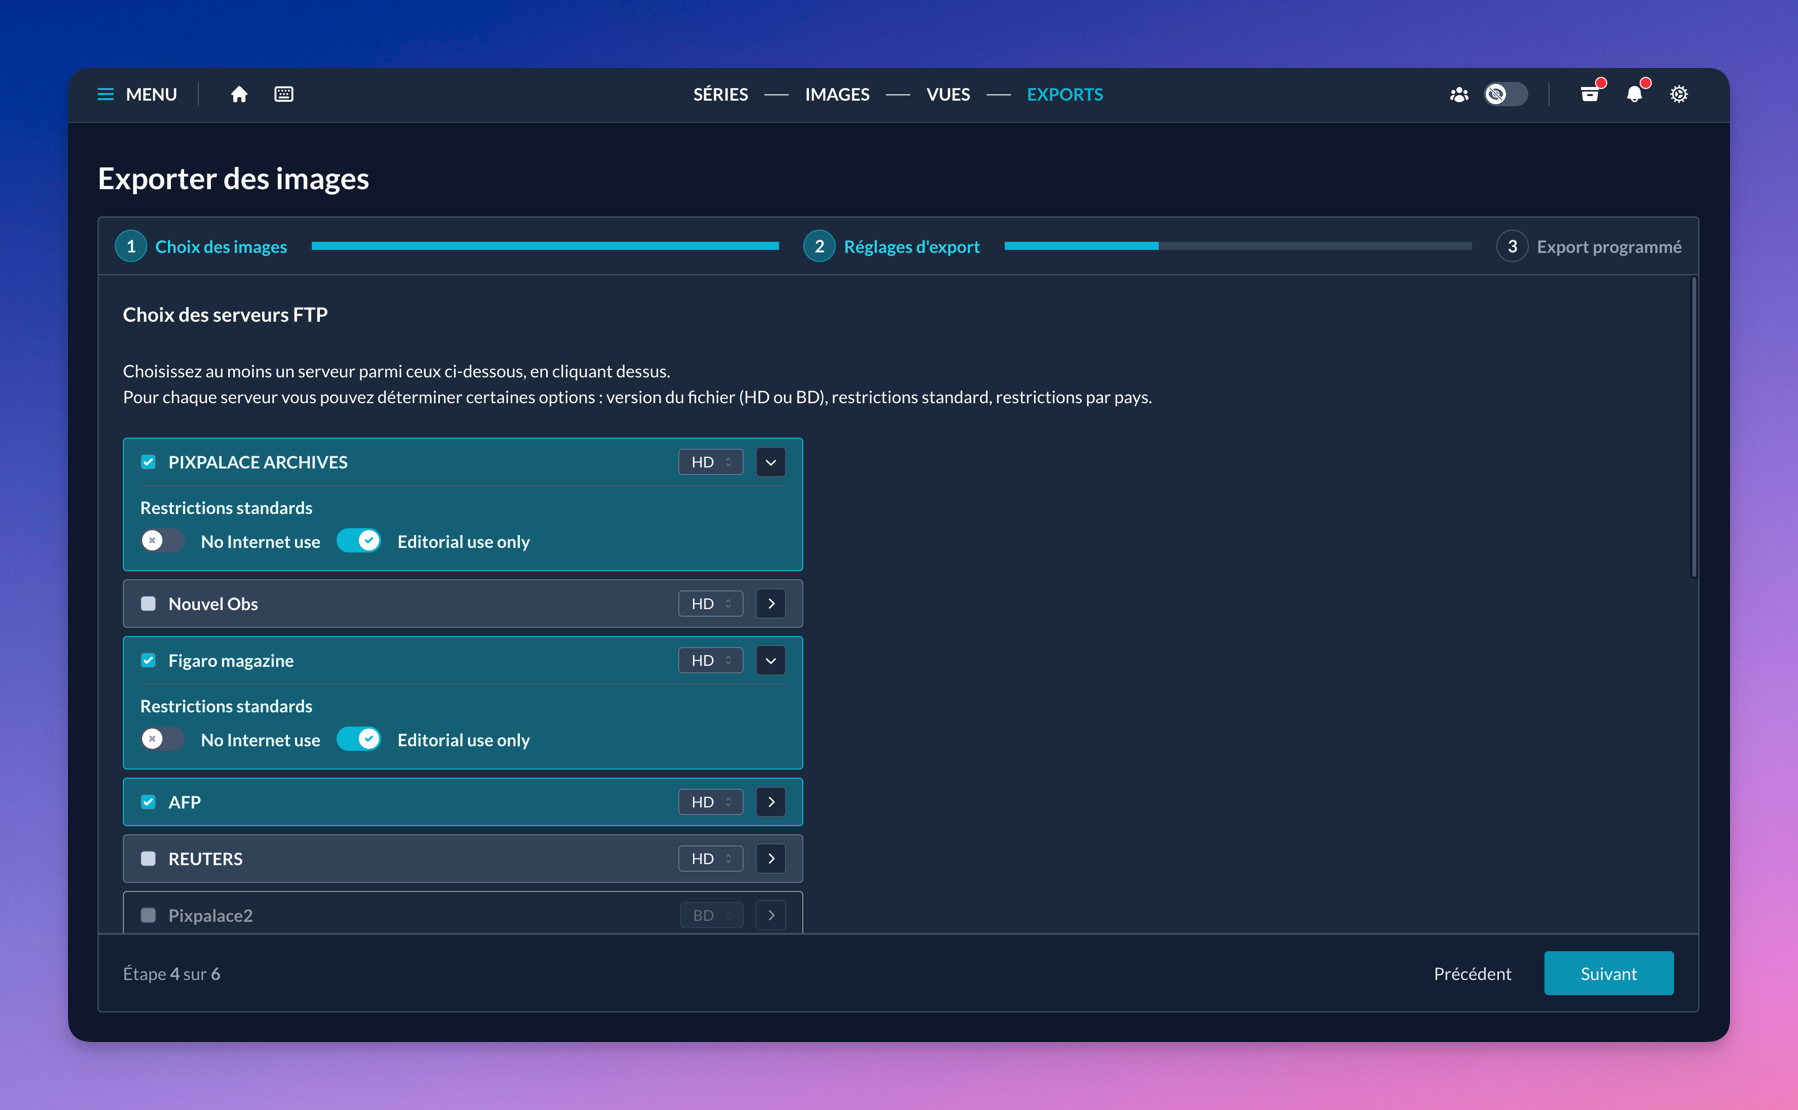
Step 4: Choose export servers
At this stage, select the servers to which you want to export your images.
You can also, for each server, decide:
- Usage restrictions: these restrictions differ by server (country exclusions, web-only use, etc.).
- Image format: some servers may accept images in low or high definition. If so, you’ll be able to change the size sent (LD or HD).
Step 5: Summary and confirmation
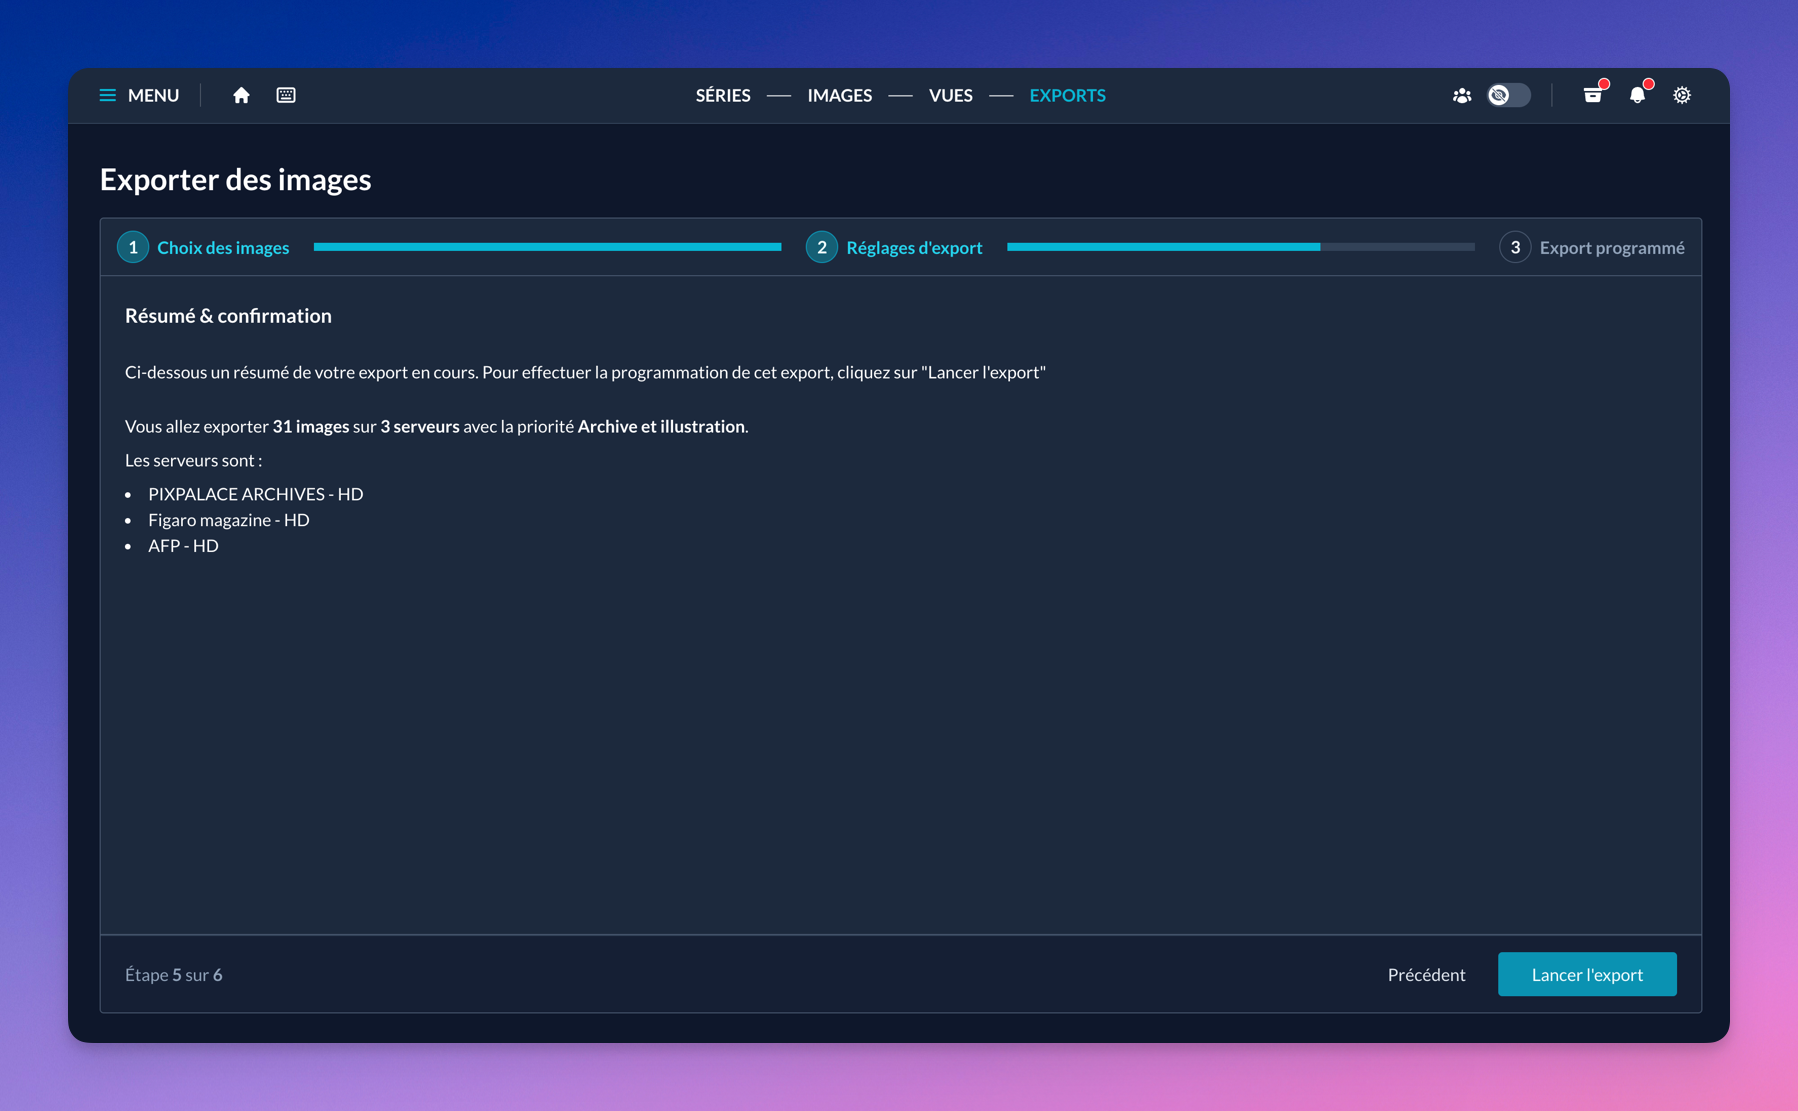
This step lets you review all the parameters selected for the export.
If everything is correct, simply click “Start export” to begin the process.
The export is then “pending” (or scheduled) in MDALL’s export queue: once completed, you’ll be notified by a notification and/or an email.
Export list
You can see all your exports on the page mdall.hanslucas.com/exports.
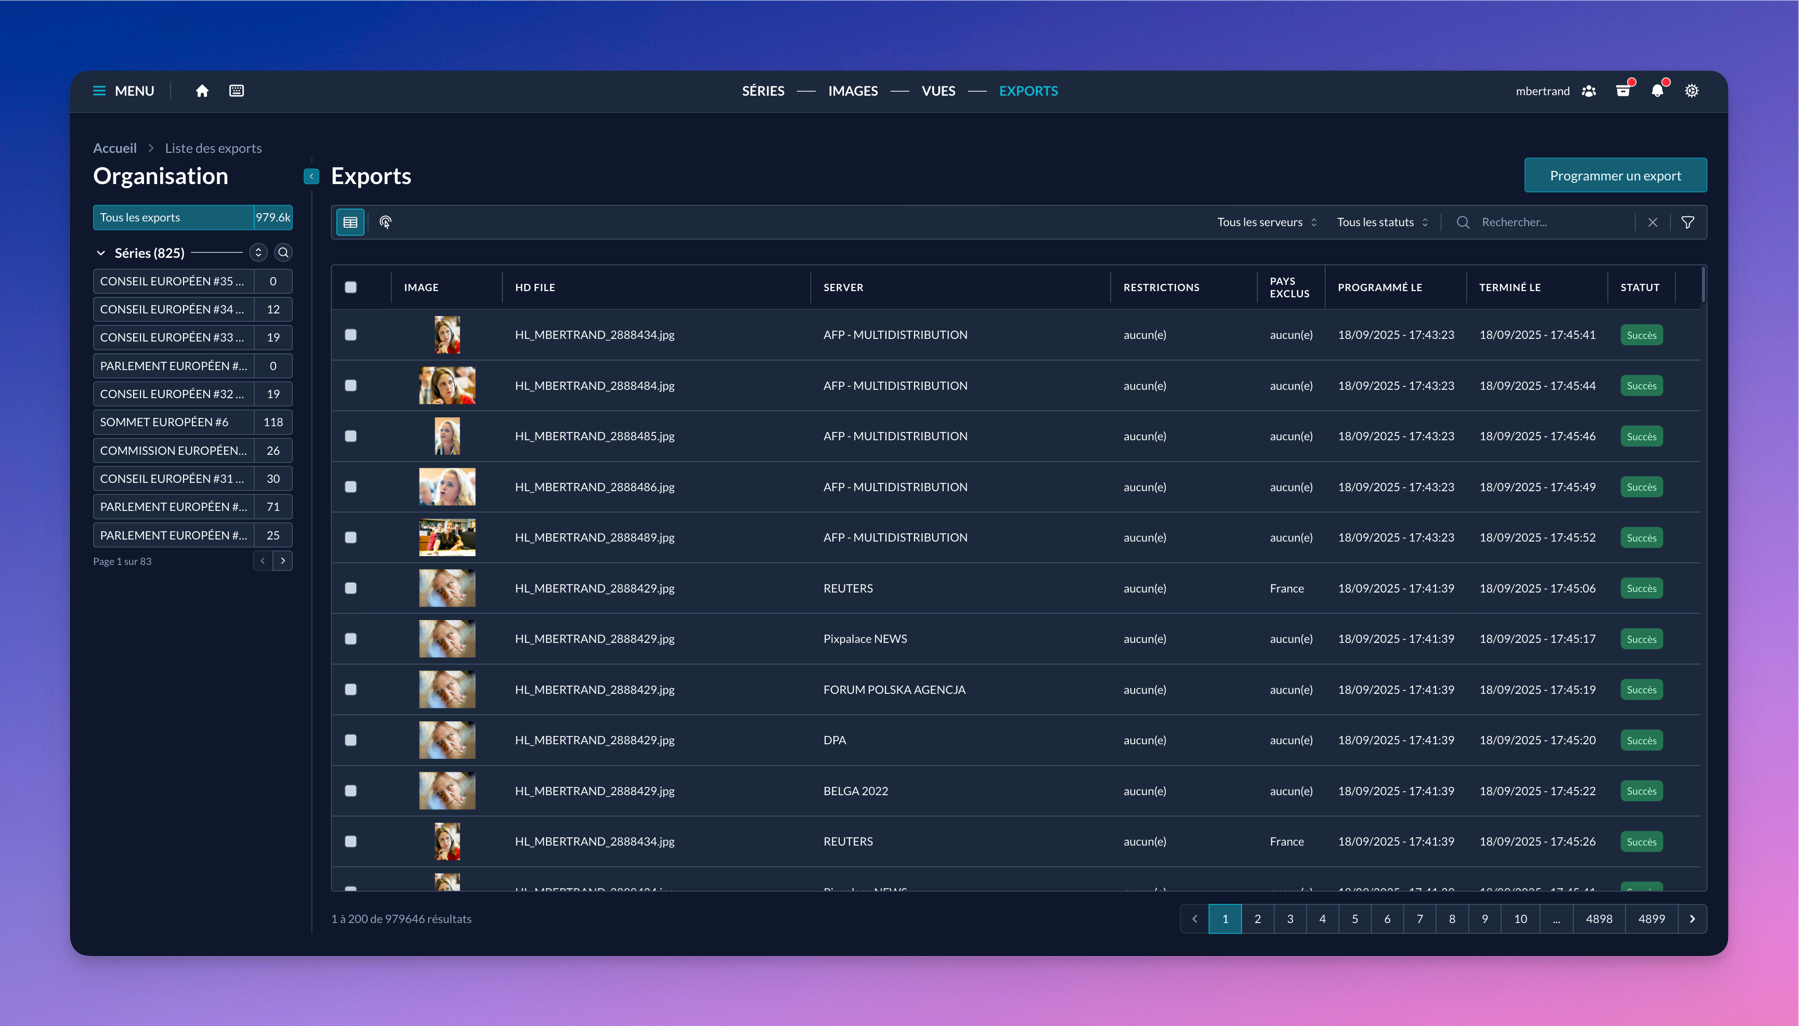
Here’s how the interface is laid out:
- Each row is the export history of an image on a server.
- For each export, you can find the export status.
- It is possible to filter by server, status, and by series.